There’s a moment in every chopper builder’s journey when the raw steel in your hands stops being just metal—and starts whispering possibilities. That’s the instant you realize you’re not just assembling parts; you’re sculpting the very DNA of your machine. Billet triple trees aren’t just components; they’re the architectural spine of your chopper’s soul, dictating how your front end breathes, flexes, and responds to the road. And here’s the revelation: you don’t need a billion-dollar fabrication lab to carve your own. With the right mindset, a few precision tools, and a willingness to embrace the alchemy of machining, you can transform a solid block of aluminum into a triple tree that’s uniquely yours—stronger, lighter, and more responsive than anything bolted off a shelf.
The Philosophy of Billet: Why Reinvent the Wheel When You Can Redesign It?
Stock triple trees are the automotive equivalent of a generic white t-shirt—functional, but forgettable. They’re designed for mass production, not mastery. Billet machining flips the script. It’s not about reinventing the wheel; it’s about sculpting a wheel that’s been stripped of compromise. When you machine your own triple trees, you’re not just customizing geometry—you’re engineering the very language your front end speaks. Every angle, every curve, every hidden pocket of material removal is a deliberate choice to optimize for your riding style, your bike’s weight distribution, and even the subtle vibrations that travel up your arms. This is where artistry meets engineering. A billet triple tree isn’t just a part; it’s a manifesto of your vision.
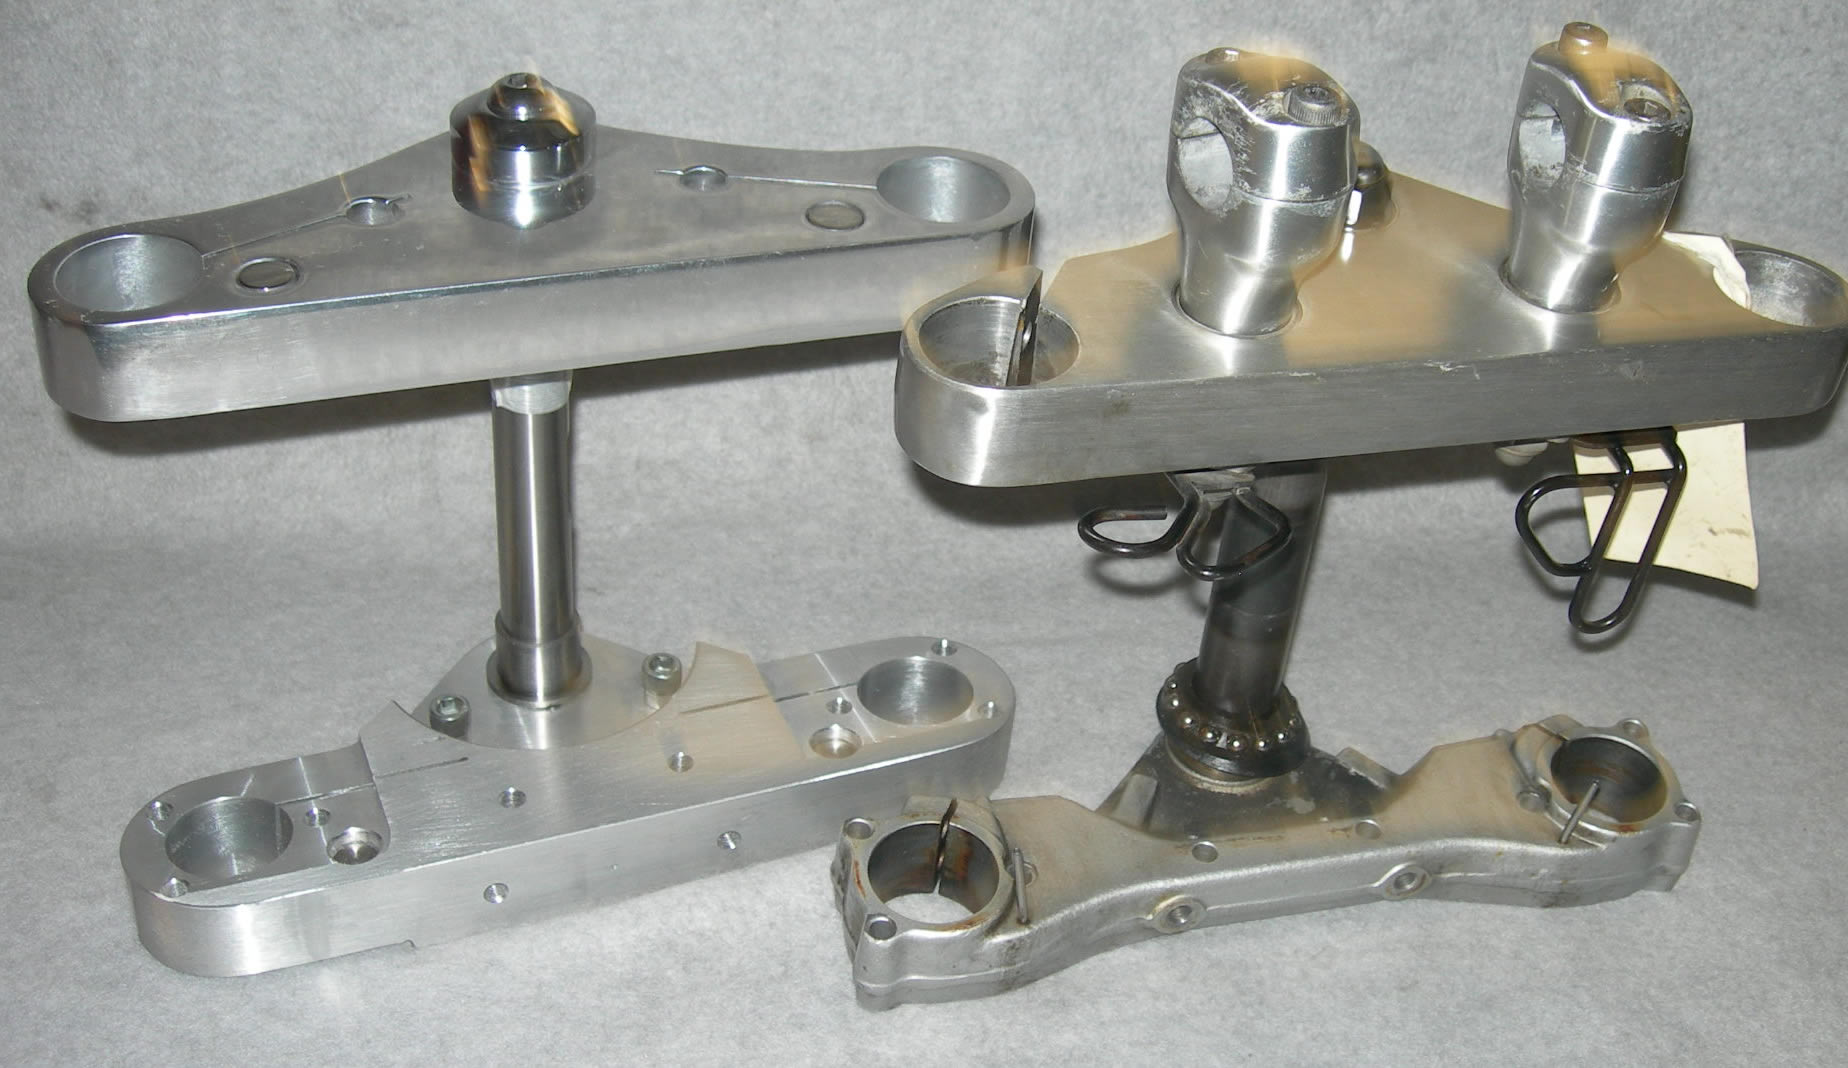
Consider the unspoken tyranny of stock triple trees: their weight, their bulk, their refusal to adapt. A billet triple tree, by contrast, is a study in subtraction. You start with a solid block of 6061-T6 aluminum or 7075-T6—a material chosen for its tensile strength and resistance to fatigue—and you carve away everything that doesn’t serve a purpose. The result? A triple tree that’s lighter than its cast counterpart, stiffer where it needs to be, and riddled with internal passageways that stock parts can only dream of. This isn’t just customization; it’s liberation from the constraints of off-the-shelf mediocrity.
The Tools of the Trade: What You Need to Carve Your Vision
Machining billet triple trees isn’t a weekend warrior’s weekend project. It’s a symphony of precision, requiring tools that are as much extensions of your hands as they are machines. At the heart of the operation is a CNC milling machine—whether it’s a benchtop model like the Haas Mini Mill or a larger vertical machining center. But a CNC alone won’t cut it. You’ll need a 4th-axis rotary table to handle the complex angles of triple tree machining, a set of high-speed steel or carbide end mills for roughing and finishing, and a digital caliper or micrometer with sub-0.001″ accuracy to verify every dimension. Don’t overlook the importance of cutting fluids—they’re not just for cooling; they’re the difference between a clean cut and a ruined workpiece.
If you’re working with a manual mill, the game changes entirely. You’ll need a digital readout (DRO) to eliminate human error, a precision vise to hold your billet securely, and a set of parallels to ensure flatness. And let’s not forget the deburring tools—because even the most meticulously machined part can become a safety hazard if left with razor-sharp edges. The key here is to treat your tools like an extension of your body. They’re not just instruments; they’re the brushes with which you paint your mechanical masterpiece.
From Blueprint to Reality: Designing Your Triple Tree
The first step in machining a billet triple tree isn’t turning on the mill—it’s sitting down with a CAD software like Fusion 360 or SolidWorks and letting your imagination run wild. This is where the magic begins. Start with the stock triple tree as your baseline, but don’t let it dictate your limits. Ask yourself: Do you want a triple tree with integrated brake mounts for a cleaner front end? A wider stance for stability at high speeds? Or perhaps a subtle taper to reduce weight without sacrificing strength? The possibilities are as boundless as your creativity.
When designing, pay close attention to the steering axis inclination and the rake angle. These aren’t just numbers; they’re the DNA of your bike’s handling. A steeper rake will make your chopper more stable at speed but less nimble in tight turns, while a shallower rake will sharpen your turning radius but demand more rider input. The triple tree is the fulcrum of this equation. Use your CAD software to simulate different geometries and see how they affect your bike’s behavior before you commit to a single cut. And remember: every line you draw, every dimension you tweak, is a conversation between you and the road ahead.
Once your design is locked in, export it as a STEP or IGES file and import it into your CAM software. This is where the digital meets the physical. Your CAM software will generate the toolpaths—the instructions that tell your CNC machine where to cut, how deep to go, and at what speed. Pay close attention to the feed rates and spindle speeds; aluminum is forgiving, but it’s not invincible. Too aggressive, and you’ll risk chattering or even breaking your end mill. Too conservative, and you’ll waste time and material. The sweet spot is a balance between speed and precision—a dance that only comes with experience.
The Machining Process: Where Precision Meets Passion
With your billet clamped securely in the vise and your toolpaths loaded into the CNC, it’s time to let the machine do the talking. Start with a roughing pass using a larger end mill to remove the bulk of the material quickly. This isn’t the time for finesse; it’s about efficiency. Once the bulk is gone, switch to a smaller end mill for the finishing passes, taking light cuts to achieve the smooth surfaces and tight tolerances your design demands. If you’re working with a manual mill, this is where your patience will be tested. Every pass must be measured, every dimension double-checked. There’s no room for shortcuts here.
One of the most critical steps in machining a billet triple tree is the drilling and tapping of mounting holes. These aren’t just holes; they’re the points where your triple tree will interface with the rest of your bike. Use a center drill to start each hole, then drill to the proper depth before tapping. A thread gauge is essential here—imperfect threads can lead to catastrophic failure down the road. And don’t forget to deburr every hole. A single burr can throw off your alignment or even damage your fork tubes.
As you near the finish line, take a step back and admire your work. Run your fingers over the surfaces, feeling for any imperfections. This isn’t just a part; it’s a testament to your skill. But the job isn’t done yet. The final step is anodizing or powder coating to protect your triple tree from corrosion and wear. Anodizing, in particular, offers a hard, durable finish that can be dyed to match your bike’s aesthetic. It’s the cherry on top of your mechanical masterpiece—a final touch that elevates your triple tree from functional to extraordinary.
The Reward: A Triple Tree That’s Unmistakably Yours
When you finally bolt your newly machined billet triple tree onto your chopper, the feeling is indescribable. This isn’t just a part you installed; it’s a part you created. Every curve, every angle, every hidden detail is a reflection of your vision. And the best part? It fits perfectly. No shims, no adjustments, no compromises. Your triple tree isn’t just compatible with your bike—it’s an integral part of it, designed to work in harmony with every other component.
But the real reward isn’t just in the finished product—it’s in the journey. Machining your own billet triple trees forces you to confront your limitations, to push beyond them, and to emerge with a deeper understanding of what it means to build a chopper. It’s a reminder that the best machines aren’t just assembled; they’re coaxed into existence, one careful cut at a time. And when you take your chopper out for that first ride, feeling the way it responds to your every input, you’ll know that you didn’t just build a bike. You built a legacy.
So, are you ready to redefine what’s possible? The steel is waiting. The tools are ready. And the road is calling. All that’s left is for you to answer.