When it comes to optimizing your vehicle’s performance, few components are as critical yet often overlooked as the carburetor. This device not only blends air and fuel for efficient combustion but also plays a pivotal role in throttle response and fuel economy. Regular cleaning and maintenance can dramatically enhance your engine’s responsiveness and reduce fuel consumption. This comprehensive guide will equip you with the knowledge needed to restore and maintain your carburetor efficiently.
Understanding the Carburetor: The Heart of Fuel Delivery
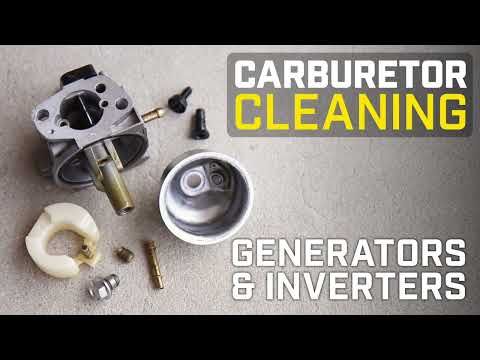
The carburetor is a mechanical device that operates on the principles of atmospheric pressure and vacuum. It consists of various components such as jets, floats, needles, and an air intake. Each part contributes to the precise mixing of air and fuel. Because of its complexity, any malfunction—often evidenced by sluggish throttle response—can lead to subpar engine performance.
Signs Your Carburetor Needs Cleaning
- Poor Throttle Response: Hesitation or delay when pressing the accelerator can indicate a dirty carburetor.
- Increased Fuel Consumption: A reduction in fuel efficiency often results from improper fuel-air mixture, pointing to potential blockages within the carburetor.
- Stalling or Rough Idling: If your engine frequently stalls or idles unevenly, debris in the carburetor may be at fault.
- Excessive Emissions: A well-functioning carburetor helps maintain complete combustion. Poor performance leads to increased emissions.
Gathering Your Cleaning Supplies
Before embarking on a cleaning venture, it is essential to assemble the necessary tools and materials. A well-prepared workspace can streamline this task significantly:
- Carburetor cleaner: A specialized solvent designed to dissolve gum, varnish, and carbon deposits.
- Soft bristle brush: Perfect for scrubbing without scratching the delicate surfaces of carburetor components.
- Compressed air: Useful for blowing out debris and ensuring thorough cleaning.
- Socket set and screwdrivers: Essential for disassembling the carburetor from its mount.
- Fuel line wrench: Helpful for safely disconnecting fuel lines without damaging them.
- Safety goggles and gloves: Always prioritize safety while handling chemicals and sharp tools.
Carburetor Removal: A Step-by-Step Process
Removing the carburetor efficiently requires a blend of caution and precision. Follow these steps to ensure a successful removal:
- Disconnect the battery: Always start by disconnecting the negative terminal to prevent any electrical mishaps.
- Drain the fuel: Use a container to catch excess fuel from the carburetor. This step prevents spills during disassembly.
- Remove the air cleaner: Unscrew any clamps and detach the air cleaner assembly to gain access to the carburetor.
- Detach fuel lines: Carefully, use your fuel line wrench to disconnect the fuel lines. Be prepared for a small fuel leak.
- Unbolt the carburetor: Once it is clear of connections, unbolt the carburetor, gently lifting it off the manifold.
Cleaning the Carburetor: Techniques and Tips
With the carburetor removed, the real task begins. The objective is to restore each component to a pristine condition:
- Disassemble: Carefully take apart the carburetor, making note of the arrangement of each part. A camera or diagram can help keep track of small components.
- Soak Components: Immerse disassembled parts in carburetor cleaner for a recommended duration to break down thick deposits.
- Brush and Rinse: For stubborn areas, use a soft bristle brush to scrub away build-up. Rinse components well with water or additional solvent.
- Dry with Compressed Air: Thoroughly blow dry each piece with compressed air to prevent moisture retention.
- Inspect for Damage: While cleaning, check for wear, cracks, or damaged gaskets that may need replacement.
Reassembly and Reinstallation
After cleaning, it’s time to reassemble your carburetor:
- Reattach Components: Follow your earlier notes or photos and carefully put the carburetor back together, ensuring gaskets are properly situated.
- Bolting Down: Secure the carburetor onto the manifold, ensuring an even torque for a proper seal.
- Reconnect Fuel Lines and Air Cleaner: Carefully reattach the fuel lines and air cleaner assembly, ensuring there are no leaks.
- Reconnect the Battery: Once everything is secured, reconnect your battery and double-check your connections.
Testing the Results
Start the engine and let it idle for a few minutes to ensure everything is functioning correctly. Observe throttle response and listen for any unusual sounds. A well-cleaned carburetor should result in smoother acceleration, better fuel economy, and overall enhanced engine performance.
Final Thoughts
Regular maintenance of your carburetor can yield significant benefits, including improved throttle response and enhanced fuel economy. A clean carburetor ensures proper air-fuel mixture and boosts engine efficiency. By keeping a routine cleaning schedule, you can extend the life of your vehicle’s engine while enjoying the thrill of a responsive drive. Invest the time, and your car will reward you with energetic performance and increased reliability.