The Harley-Davidson Evolution engine, affectionately known as the Evo, is more than just a powerplant—it’s the heartbeat of countless choppers that roar down the open road. There’s something almost mythic about lifting an Evo from its cradle and watching it cradle in a chopper frame, as if the engine itself is a living entity begging to be reborn. The process isn’t just mechanical; it’s a ritual of respect for the machine, a dialogue between builder and beast. Yet, despite its iconic status, removing and installing an Evo in a chopper frame remains a daunting task for many. Why does this process captivate builders and riders alike? Perhaps it’s the raw intimacy of the task—the way your hands become extensions of the machine, the way every bolt tells a story of miles traveled and dreams pursued. Or maybe it’s the deeper allure of transformation, the chance to resurrect a tired engine into something that roars with renewed purpose. Whatever the reason, mastering the art of Evo engine swaps is a rite of passage for any chopper enthusiast.
The Anatomy of the Evo: Understanding What You’re Working With
The Harley Evo engine isn’t just a lump of metal and oil—it’s a masterclass in engineering simplicity and brute reliability. Cast from iron and aluminum, the Evo’s design prioritizes durability over flash, a philosophy that has cemented its legacy in the chopper world. At its core, the Evo is a 45-degree V-twin with a displacement of 883cc or 1200cc, depending on the variant. The cylinder heads feature hemispherical combustion chambers, a nod to Harley’s racing heritage, while the single camshaft nestled between the cylinders ensures smooth, predictable power delivery. But here’s where the magic happens: the Evo’s modular design allows for easy disassembly and reassembly, a feature that makes it a favorite among chopper builders. The engine’s compact footprint also lends itself beautifully to custom frames, where space is often at a premium. Yet, despite its rugged simplicity, the Evo demands respect. Its weight—nearly 300 pounds in a bare engine configuration—means that every lift, every bolt turned, is a test of strength and precision. Understanding the Evo’s architecture isn’t just about knowing where the parts go; it’s about recognizing the engine as a living system, one that thrives on balance and harmony.
Preparation: The Unsung Hero of a Smooth Engine Swap
Before a single wrench is turned, the groundwork must be laid. Preparation isn’t just about having the right tools—it’s about cultivating the mindset of a craftsman. Start by selecting a workspace that’s clean, well-lit, and free of distractions. A garage with ample overhead clearance is ideal, but even a driveway can suffice if organized properly. Gather your arsenal: a sturdy engine hoist, a set of quality sockets and wrenches, torque wrenches calibrated to Harley’s specifications, and a magnetic tray to corral the inevitable flood of bolts. Don’t overlook the small but critical items—a torque wrench is useless without the correct adapter, and a drop cloth can save hours of frustration by catching stray fluids. Equally important is the mental preparation. Sketch out a step-by-step plan, even if it’s just in your head. Visualize the process: the engine’s removal, the frame’s inspection, the reinstallation. Anticipate the challenges—the stubborn bolts, the misaligned mounts, the moment when the engine refuses to budge. Preparation isn’t just about avoiding mistakes; it’s about embracing the process with confidence, knowing that every hurdle overcome brings you one step closer to a machine that’s truly yours.
Removing the Evo: The Delicate Dance of Disassembly
With tools in hand and nerves steady, the real work begins. Removing an Evo from its frame is less about brute force and more about finesse. Start by draining the oil and coolant, if applicable, and disconnecting the battery to eliminate any electrical hazards. Next, remove the primary chaincase cover to expose the inner workings of the transmission and clutch. Here’s where the first challenge often arises: the primary chain tensioner. On some models, it’s a simple bolt; on others, it’s a labyrinth of linkages that must be carefully disengaged. Take your time. A stripped bolt or a misaligned chain can turn a straightforward job into a weekend-long ordeal. Once the primary is clear, shift your focus to the engine mounts. Most chopper frames use a four-point mounting system, with two bolts securing the engine to the frame at the top and two at the bottom. These bolts are typically torqued to Harley’s specifications, so a breaker bar and penetrating oil may be necessary to loosen them. As the last bolt gives way, the engine will hang suspended from the hoist, a silent testament to the miles it’s carried. Lower it gently—this isn’t just an engine; it’s a piece of history being set aside, if only temporarily.

Frame Inspection: The Forgotten Step That Saves Future Headaches
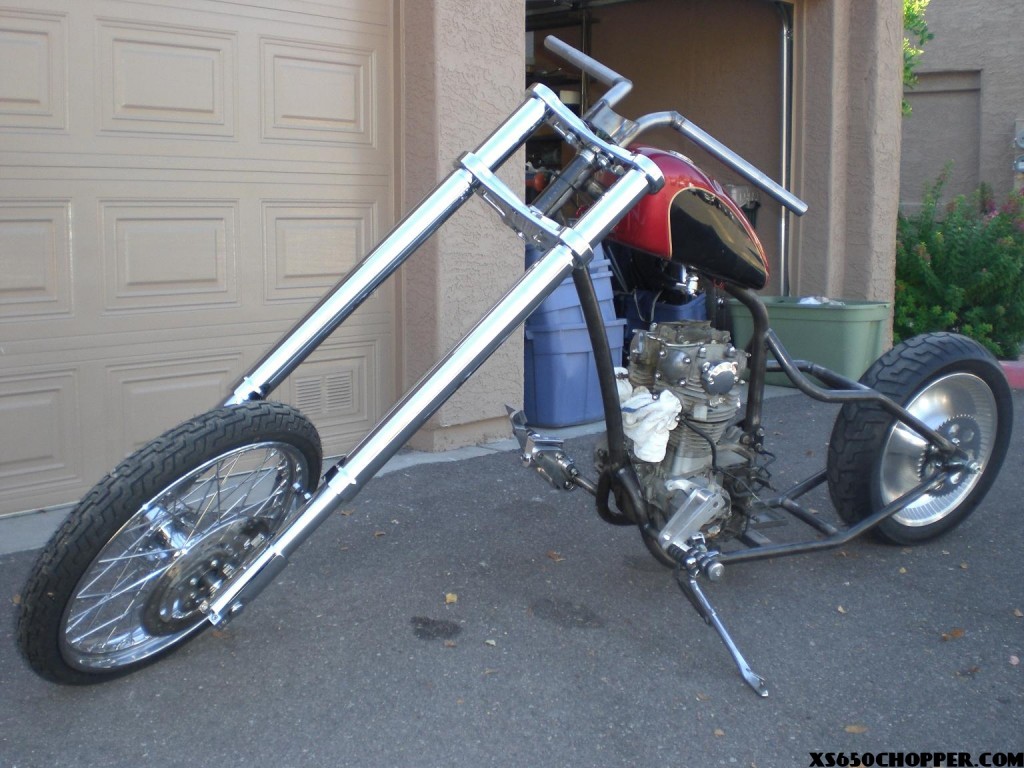
With the Evo resting on a workbench, the frame demands your attention. This is the moment where many builders make a critical mistake: assuming the frame is ready for the new engine. Take a flashlight and inspect every inch. Look for cracks, rust, or warping in the engine cradle. Check the mounting holes for stripped threads or misalignment. Pay special attention to the frame’s geometry—even a slight deviation can throw off the engine’s alignment, leading to vibration, premature wear, or worse. If the frame is steel, consider media blasting it to remove years of grime and rust. For aluminum frames, a thorough cleaning with a degreaser will suffice. Don’t forget the small details: the condition of the battery tray, the integrity of the wiring harness, the functionality of the kickstand. A chopper frame isn’t just a skeleton; it’s the foundation of your build, the canvas on which your mechanical masterpiece will take shape. Skimp on this step, and you’ll pay the price later—with a bike that handles like a bucking bronco or an engine that screams in protest.
Installing the Evo: The Art of Precision and Patience
Reinstalling the Evo is where the builder’s skill is truly tested. Begin by aligning the engine mounts with the frame’s cradle. This is easier said than done. The Evo’s weight can make fine adjustments nearly impossible without assistance, so enlist a helper or use a second hoist to guide the engine into place. Once the mounts are aligned, insert the bolts—but don’t torque them yet. Instead, use them to snug the engine into position, ensuring it sits flush against the frame. Only then should you begin the laborious process of torquing each bolt to Harley’s specifications. A torque wrench is non-negotiable here; over-tightening can strip threads, while under-tightening risks catastrophic failure down the road. Next, reconnect the primary chain and tensioner. This step requires patience. The chain must be taut but not overly tight, and the tensioner must engage smoothly to prevent slack from developing during operation. Finally, reinstall the primary chaincase cover, ensuring all gaskets are seated correctly to prevent leaks. It’s a symphony of steps, each one critical to the engine’s longevity and performance.

Fine-Tuning: The Final Touch That Makes the Difference
The engine is in place, the bolts are torqued, and the primary is reconnected. But the job isn’t done yet. Fine-tuning is where a good build becomes a great one. Start with the carburetion or fuel injection system, depending on your Evo’s configuration. An improperly tuned engine will run rich or lean, wasting fuel and robbing power. Next, check the ignition timing. A mistimed engine can lead to pinging, reduced performance, or even engine damage. If your Evo is equipped with an aftermarket ignition, consult the manufacturer’s guidelines for optimal settings. Finally, take the bike for a test ride—but not just any ride. Push it through its paces: wide-open throttle pulls, slow-speed maneuvers, hard braking. Listen for unusual noises, feel for vibrations, watch for warning lights. Fine-tuning isn’t a one-time event; it’s an ongoing dialogue between rider and machine. The goal isn’t just to make the engine run—it’s to make it sing, to coax every last ounce of power and soul from the Evo’s iron heart.
The Deeper Allure: Why the Evo Captivates Builders and Riders
There’s a reason the Harley Evo engine has endured for decades, outlasting trends and technological revolutions. It’s not just about the power or the sound—though those are undeniable draws. It’s about the connection it fosters between builder and machine. The Evo is a blank canvas, a mechanical muse that invites creativity and experimentation. It’s the engine that powered the first wave of choppers, the engine that carried riders from coast to coast, the engine that became a symbol of freedom and individuality. When you remove an Evo from a frame, you’re not just performing maintenance; you’re participating in a legacy. You’re holding a piece of Harley-Davidson history in your hands, a testament to the brand’s unyielding commitment to simplicity and reliability. And when you reinstall it, you’re breathing new life into that legacy, ensuring that the Evo’s roar will echo through the generations. That’s the deeper fascination—the knowledge that every bolt turned, every adjustment made, is a thread in the tapestry of chopper culture. It’s why builders return to the Evo time and time again, not out of obligation, but out of love.