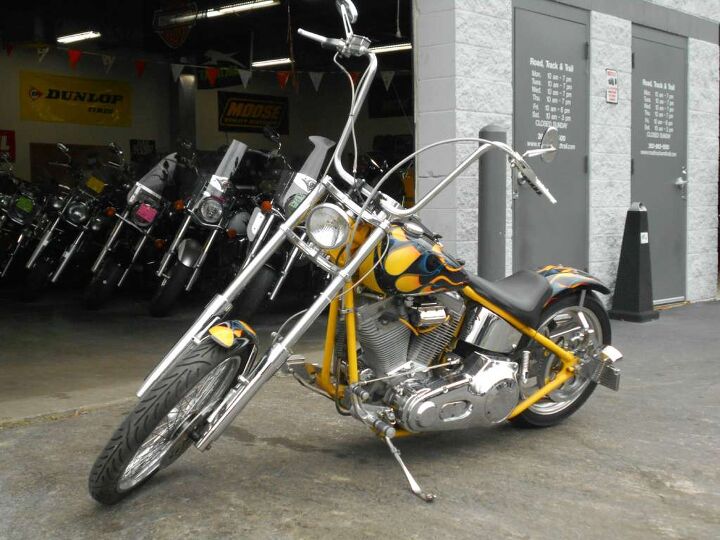
There’s something primal about a chopper motorcycle—its raw, unfiltered essence speaks to the soul of the open road, where every twist of the throttle feels like a rebellion against convention. Yet, beneath that gleaming chrome and rumbling V-twin lies a labyrinth of wires, a nervous system that, when mastered, transforms a pile of parts into a roaring beast of burden and beauty. Wiring a custom chopper without a manual isn’t just a task; it’s an odyssey, a dance with electricity that rewards patience, intuition, and a willingness to embrace the unknown.
The Allure of the Uncharted: Why Wiring a Chopper Feels Like Solving a Mystery
Every chopper builder knows the thrill of staring at a tangle of wires, each one a clue in a puzzle that hasn’t been solved before. Unlike mass-produced motorcycles, where schematics are as standardized as the paint job, a custom chopper is a blank canvas—one where the artist must decipher the language of volts and amps without a Rosetta Stone. This isn’t just about connecting wires; it’s about understanding the heartbeat of the machine. The fascination isn’t merely technical—it’s existential. Wiring a chopper is a dialogue between builder and machine, where each connection feels like a whispered secret shared between old friends.
The deeper reason this process captivates us lies in the challenge itself. In a world where everything is digitized and pre-packaged, building a chopper from scratch is a defiant act of creation. There’s no app to guide you, no YouTube tutorial that covers *your* exact setup. The absence of a manual forces you to rely on first principles: Ohm’s Law, the color-coding of wires, the logic of circuits. It’s a return to basics, a reminder that some knowledge can’t be outsourced.
Gathering Your Arsenal: Tools and Materials for the Electrical Campaign
Before the first wire is stripped, you need an arsenal. This isn’t a casual weekend project—it’s a campaign against chaos, and every tool is a weapon in your arsenal. Start with the essentials: a multimeter (your new best friend), wire strippers, crimping pliers, heat shrink tubing, electrical tape, and a soldering iron. Don’t skimp on quality here; a cheap multimeter will lie to you, and a flimsy crimp will betray you at 60 mph.
Next, the wires themselves. Choppers demand flexibility—your wiring harness will flex, twist, and vibrate with every mile. Use stranded copper wire, preferably with silicone insulation, which resists heat and cracking. Color-coding is your lifeline. While there’s no universal standard, most builders follow a loose convention: red for power, black for ground, yellow for ignition, and so on. If you’re working with a donor bike, salvage what you can, but be prepared to re-terminate connections if they’re corroded or brittle.
Don’t forget the fuse box. A chopper’s electrical system is a beast that must be tamed, and a fuse is your first line of defense against meltdowns. Choose a fuse block that matches your system’s amperage, and place it as close to the battery as possible to minimize voltage drop. Remember: an unprotected circuit is a ticking time bomb.
The Anatomy of a Chopper’s Nervous System: Understanding Circuits
A chopper’s wiring isn’t just a mess of wires—it’s a living, breathing network of circuits, each with a purpose as vital as the next. At its core, the system can be broken down into a few key components: the power source (the battery), the ignition system, the lighting circuit, and the accessories (like the charging system or aftermarket gauges).
The battery is the heart, pumping volts through the veins of the machine. The ignition system is the brain, deciding when to fire the spark plugs. The lighting circuit is the soul, guiding the rider through the dark with its glow. And the accessories? They’re the personality—the extra flair that makes your chopper *yours*.
But here’s where things get interesting. Unlike a production bike, where circuits are neatly segregated, a chopper’s wiring is often a Frankenstein’s monster of additions and modifications. You might have a vintage ignition system bolted to a modern LED lighting setup, all cobbled together with whatever wire you had lying around. This is where the real challenge begins: making disparate systems play nice together. It’s not just about connecting A to B—it’s about ensuring that the voltage drop across a 20-foot run of wire doesn’t starve your headlight of power.
Mapping the Unknown: Creating Your Own Schematic
Without a manual, you’re flying blind. The only way to navigate is to draw your own map. Grab a notebook and start sketching. Don’t worry about perfection—this is a living document, one that will evolve as your build does. Begin with the battery at the center, then branch out to the ignition, lighting, and accessories. Label each wire with its gauge, color, and destination. Note the amperage of each circuit, and where fuses should be placed.
This isn’t just busywork. A well-drawn schematic is your lifeline when the inevitable happens—when a wire frays, a connection fails, or you realize you’ve wired the turn signals backward. It’s also a way to spot potential problems before they happen. For example, if you see a long run of thin wire powering a high-draw accessory, you’ll know to upsize it before it turns into a fire hazard.
Pro tip: Use a digital tool like Fritzing or even a simple CAD program to create a digital version. This way, you can zoom in, annotate, and share your design with fellow builders for feedback. The act of drawing it out will force you to think critically about your system’s layout, and you might catch mistakes before they’re soldered into place.
The Dance of the Wires: Routing and Securing Your Harness
Now comes the part where theory meets reality. Routing a wiring harness isn’t just about getting the wires from point A to point B—it’s about doing so in a way that’s clean, protected, and vibration-resistant. Chaos is the enemy here. A loose wire can chafe against metal, a sharp edge can slice through insulation, and a poorly secured harness can rattle itself to death in a matter of miles.
Start by planning your route. Avoid areas with excessive heat or moving parts. Use grommets where wires pass through metal to prevent abrasion. Secure the harness with nylon ties or Adel clamps, but don’t cinch them too tight—wires need room to breathe. For long runs, consider using convoluted tubing or split-loom to bundle wires together, keeping them tidy and protected.
Here’s a pro move: leave yourself some slack at key connection points. Wires expand and contract with temperature changes, and a harness that’s pulled taut today might be stressed tomorrow. A little give now prevents a headache later.

Testing and Troubleshooting: The Moment of Truth
With the harness in place, it’s time to flip the switch. But before you do, double-check everything. Polarity matters—reverse the battery terminals, and you’ll be replacing fried components. Verify that all grounds are solid; a poor ground is the most common cause of electrical gremlins. And for the love of all that’s holy, make sure your ignition system is isolated from the lighting circuit. Cross those wires, and you’ll be pushing your bike home before you’ve even left the driveway.
When you finally turn the key, listen for the purr of the engine, the click of the relays, the glow of the lights. If something doesn’t work, don’t panic. Electrical gremlins are part detective story, part exorcism. Start with the basics: Is the battery charged? Are all connections secure? Is there continuity where there should be? A multimeter is your divining rod here—use it to trace the flow of electricity, to hunt down shorts, and to confirm that your schematic is holding up under real-world conditions.
Common culprits include loose terminals, corroded connections, and voltage drops. If a component isn’t getting power, trace the circuit backward from the device to the source. If a fuse keeps blowing, you’ve got a short somewhere—time to play hide-and-seek with your wires. And if the engine cranks but won’t start? Check the ignition circuit first. A chopper’s electrical system is a symphony, and one sour note can bring the whole performance to a halt.
The Reward: A Machine Born of Your Own Hands
There’s a moment, somewhere between the first spark and the first ride, when the chopper ceases to be a collection of parts and becomes something more—a testament to your patience, your problem-solving, and your refusal to take the easy path. Wiring a chopper without a manual isn’t just about getting it to run; it’s about forging a connection with the machine that’s deeper than bolts and paint. It’s about understanding that every wire, every connection, is a thread in the tapestry of your build.
And when you finally twist the throttle and feel the engine roar to life, knowing that you wired it yourself? That’s the kind of satisfaction that can’t be bought. It’s the difference between riding a bike and commanding a beast. It’s the difference between a machine and a masterpiece.