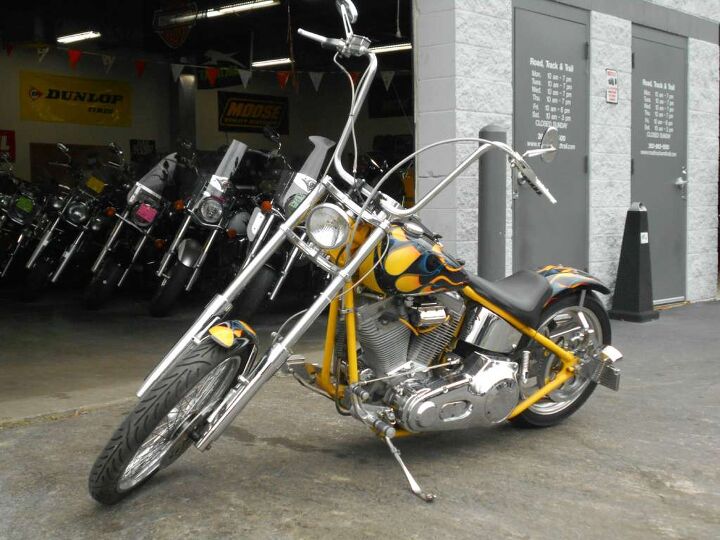
The hand shifter, affectionately dubbed the “jockey shift,” is the heartbeat of a Harley chopper—a mechanical ballet where steel meets soul, and the rider’s will is etched into the bike’s very soul. It’s not just a lever; it’s a declaration of intent, a rebellion against the mundane, a whisper to the open road that says, “This machine obeys *me*.” Unlike the pedestrian foot clutch, the jockey shift is a daredevil’s choice, a nod to the outlaws and greasers who turned two wheels into a statement. It’s raw, it’s visceral, and when done right, it transforms a chopper from a mere machine into a symphony of motion. But how does one tame this mechanical stallion? Let’s dive into the art of setting up a hand shifter on a Harley chopper, where every bolt tightened is a verse in the rider’s manifesto.
The Allure of the Jockey Shift: Why It’s More Than Just a Shift Lever
Imagine, for a moment, the foot clutch as a metronome—steady, predictable, bound by the rhythm of convention. Now picture the hand shifter as a jazz improvisation, where every shift is a solo, a moment of pure, unfiltered expression. The jockey shift isn’t just a functional upgrade; it’s a philosophical one. It turns the act of changing gears from a chore into a ritual, a dance between rider and machine that demands precision, intuition, and a touch of audacity.
The appeal lies in its rarity. In a world where most bikes kneel to the tyranny of the foot, the chopper that roars to life with a hand lever is a relic of a wilder time—a time when mechanics were poets, and every ride was a performance. It’s a conversation starter, a badge of honor, and, for the uninitiated, a source of bewildered admiration. But beneath the bravado, there’s a practical magic: the hand shifter offers a level of control that’s unmatched, allowing riders to shift with surgical precision, even in the heat of a twisty canyon or the chaos of a drag strip.
Gathering Your Arsenal: Tools and Components for the Ritual
Before the dance begins, the stage must be set. Setting up a jockey shift is less about brute force and more about finesse, which means assembling the right tools and components is half the battle. You’ll need:
- Hand Shifter Assembly: This isn’t just a lever—it’s the conductor’s baton of your mechanical orchestra. Look for one forged from billet aluminum or chromoly steel, designed to marry seamlessly with your bike’s ergonomics.
- Shift Linkage: The invisible thread that connects your hand to the transmission. It must be adjustable, durable, and free of slop. Stainless steel or chromoly rods are the gold standard here.
- Ball Joints and Rod Ends: These are the joints of your mechanical skeleton, where precision matters. Opt for high-quality, greaseable ball joints to ensure smooth, silent shifts.
- Clutch Cable: If you’re retaining the foot clutch for backup (a wise choice for novices), ensure your clutch cable is fresh and properly routed. A sticky cable is the enemy of fluid shifts.
- Wrenches, Allen Keys, and a Torque Wrench: The tools of your trade. A torque wrench is non-negotiable—over-tightening a bolt can turn your masterpiece into a pile of scrap.
- Thread Locker and Anti-Seize: The unsung heroes of any build. Use thread locker on critical bolts to prevent them from betraying you mid-ride, and anti-seize on any threaded components that might seize under heat.
Pro tip: Before you begin, lay out all your components like a surgeon preparing for an operation. A cluttered workspace is a recipe for dropped bolts and muttered curses.
Removing the Old Guard: Dismantling the Foot Clutch (If Applicable)
If your chopper was born with a foot clutch, its removal is the first act of defiance. This isn’t just about unscrewing bolts—it’s about severing the chains of conformity. Start by draining the primary chaincase oil (save it if it’s still fresh) and then detach the clutch cable from the lever. Next, remove the clutch cover, exposing the inner workings like a surgeon’s patient on the table.
Unbolt the clutch hub, paying close attention to the pressure plate and the basket. These parts may need cleaning or replacement, especially if they’ve seen better days. As you work, take mental notes—or better yet, photographs—of how everything fits together. The devil is in the details, and a misplaced washer can turn your jockey shift into a jigsaw puzzle.
Once the old clutch is out, take a moment to admire the newly exposed transmission. This is where the magic happens, where the engine’s power is harnessed and directed. Treat it with respect; it’s the heart of your beast.
Mounting the Hand Shifter: Forging the Connection Between Hand and Transmission
Now comes the moment of truth: installing the hand shifter itself. This is where the chopper starts to feel like *yours*. Begin by selecting a mounting location that’s ergonomic yet unobtrusive. The ideal spot is within easy reach of your left hand (assuming you’re right-handed) without forcing you into an awkward grip. Most builders opt for the left side of the tank, but some prefer the handlebar or even a custom bracket welded to the frame.
Once you’ve found your sweet spot, mark the mounting holes and drill carefully. If you’re welding a custom bracket, ensure it’s aligned perfectly—there’s no room for error here. Bolt the shifter into place, but don’t tighten it fully yet. You’ll need to adjust its angle and position once the linkage is connected.
The shifter’s orientation is critical. It should sit at a natural angle, allowing your wrist to move fluidly between gears. Too steep, and you’ll fatigue quickly; too shallow, and you’ll lose leverage. Experiment with the angle until it feels like an extension of your arm, not a foreign object bolted to your bike.
Linking the Chain: Crafting the Invisible Thread Between Lever and Transmission
The shift linkage is the unsung hero of the jockey shift setup—a series of rods, ball joints, and rod ends that translate your hand’s command into mechanical motion. This is where precision becomes paramount. Start by measuring the distance between the shifter’s output shaft and the transmission’s input shaft. You’ll need to cut or adjust your linkage rods to this exact length, accounting for any angles or bends in the route.
Thread the rods through the frame, avoiding any sharp edges or hot components (exhaust pipes are notorious for this). Attach the rod ends to the shifter and transmission shafts, ensuring they’re snug but not overly tight. A little play is necessary for smooth operation, but too much will result in sloppy shifts and a bike that feels like it’s fighting you.
Test the linkage by moving the shifter through its full range of motion. If it binds or feels stiff, adjust the rod lengths or ball joint angles until the motion is buttery smooth. Remember: this isn’t just about function; it’s about feel. The linkage should respond to your touch like a well-trained horse, eager to obey your every command.
Fine-Tuning the Beast: Adjusting Tension and Alignment for Peak Performance
With the linkage in place, it’s time to dial in the details. The first order of business is adjusting the shift drum’s tension. This is where the magic of smooth gear changes happens. If the tension is too loose, the bike will struggle to shift; too tight, and you’ll fight the lever like it’s possessed. Most transmissions have an adjustment screw or nut on the shift drum—turn it incrementally until the shifts are crisp and effortless.
Next, check the alignment of the shifter and transmission shafts. Misalignment is the silent killer of jockey shifts, causing premature wear and a shift feel that’s anything but silky. Use a straightedge or laser alignment tool to ensure everything is perfectly parallel. If you’re off by even a fraction of an inch, the results will be painfully obvious once you’re on the road.
Finally, grease all the linkage joints and ball ends. A dry linkage is a noisy, sticky linkage, and noise is the enemy of the chopper’s soul. Use a high-quality motorcycle grease, and don’t be stingy—this is one area where excess is a virtue.
Test Riding: The Moment of Truth Where Theory Meets the Open Road
No amount of wrenching can replace the real test: a ride. Fire up your chopper and listen to the engine’s song. With the jockey shift engaged, shift through the gears slowly at first, feeling for any hesitation or grinding. If everything feels smooth, gradually increase your speed, testing the shifts under load. Pay attention to how the bike responds—does it lurch, hesitate, or feel like it’s in sync with your intentions?
If you encounter issues, don’t panic. Common problems include:
- Hard Shifts: Often caused by incorrect linkage length or misaligned shafts. Double-check your measurements and adjust as needed.
- Popping Out of Gear: A sign of weak transmission detents or improper shift drum tension. Tighten the tension screw slightly and retest.
- Noise: A telltale rattle or clunk usually points to dry or worn linkage joints. Disassemble and grease the affected areas.
Remember, the first ride is just the beginning. The jockey shift will settle in over time, becoming more intuitive as you and your chopper learn to communicate. Treat it with patience, and it will reward you with shifts that feel like they’re happening by telepathy.
The Final Stroke: Embracing the Jockey Shift as a Lifestyle
Setting up a hand shifter on a Harley chopper isn’t just a mechanical endeavor—it’s a rite of passage. It’s the moment when your bike stops being a collection of parts and starts being an extension of your will. The jockey shift is more than a lever; it’s a statement, a rebellion, a love letter to the open road.
Once you’ve mastered it, you’ll wonder how you ever tolerated anything less. The foot clutch will feel like a shackle, the hand shifter like liberation. Every ride becomes a performance, every shift a note in your mechanical symphony. And when you roll up to a stoplight, the envious glances from passersby will tell you everything you need to know: you’ve done it right.
So go ahead—twist that throttle, pull back on the jockey shift, and let the world hear your chopper’s song. The road is waiting, and it’s yours to command.